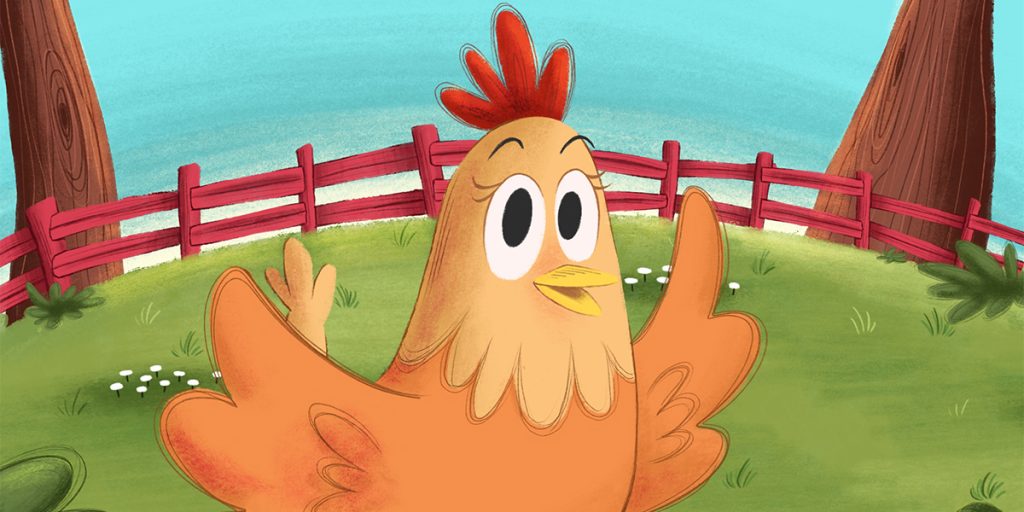

2D character design is one of the most exciting parts of digital art. Whether you want to create characters for animation, games, children’s books, comics, or your own creative projects, Photoshop gives you powerful tools to bring your ideas to life. Even if you’re a complete beginner, you can start designing expressive, appealing characters with just a basic understanding of shapes, colors, and storytelling.
Photoshop is popular among artists because it combines drawing flexibility with digital control. You can sketch rough ideas, refine details, experiment with color palettes, or develop full illustrations all in one program. This beginner-friendly guide breaks down the entire process step by step so you can confidently design your very first 2D character in Photoshop.
Understanding the Basics of 2D Character Design
Before you start drawing, it’s important to know what makes a strong character. Good character design involves shape language, proportions, personality, and visual storytelling. Every detail from hairstyle to color choices communicates something about who the character is.
Key elements to consider include:
- Silhouette: The outline of your character should look recognizable even without details.
- Personality: A character’s posture, expressions, and clothing should reflect their traits.
- Proportions: Whether realistic, stylized, or exaggerated, proportions define the character’s style.
- Color palette: Colors create mood and identity.
- Consistency: The character should look the same from multiple angles.
Understanding these basics helps you design characters that feel believable, memorable, and visually appealing.
How to Illustrate a Children’s Book by Hand: A Complete Step-by-Step Guide
Set Up Your Photoshop Workspace
Your workspace affects how smoothly you work. Start by creating a new document sized 2000 × 2000 px or larger so you have enough room to draw with details.
Helpful workspace tips:
- Choose a brush tool that supports pressure sensitivity.
- Use layers to separate sketch, line art, colors, and shading.
- Set up a color palette to maintain consistency.
- Turn on smoothing for cleaner strokes.
- Organize your workspace using Photoshop panels like Layers, Brushes, Color, and History.
A clean workspace helps you focus better and work efficiently.
How to Illustrate a Children’s Book by Hand: A Complete Step-by-Step Guide
Start With Simple Shapes
Every character begins as a set of simple shapes. This is the foundation of character design, even for professional artists.
Use basic shapes like:
- Circles for the head
- Ovals for the torso
- Rectangles for arms and legs
- Triangles for expressive poses
This step is not about perfection it’s about planning proportions, structure, and pose.
Why simple shapes matter:
- They make the design less overwhelming.
- They help maintain proportion consistency.
- They allow you to experiment with poses quickly.
Use the Brush Tool to sketch lightly on a rough sketch layer.
How to Illustrate a Children’s Book by Hand: A Complete Step-by-Step Guide
Define the Character’s Pose and Gesture
Gesture drawing adds life and movement to your character. Instead of stiff, straight lines, think about fluid curves and dynamic poses.
A good pose will:
- Communicate the character’s personality
- Look balanced
- Show energy or emotion
- Feel natural and readable
For example, a shy character may curve inward, while a confident hero stands tall with broad shoulders.
In Photoshop, you can use thin, loose strokes to explore different gestures. Don’t worry about details yet focus on energy and flow.
Storyboarding for Reels, Shorts, and Book Previews
Develop the Character’s Anatomy and Structure
Once you have your pose, begin adding body structure and forms. You don’t need to be an anatomy expert—just understand basic shapes and how they connect.
Think about:
- Torso shape
- Hip width
- Arm and leg length
- Head-to-body proportions
- Neck and shoulder structure
Photoshop’s Transform Tool (Ctrl+T) helps you adjust proportions easily if something feels off.
From Idea to Storybook: Plan with Storyboards
Design the Character’s Facial Features
Faces are the heart of character design. Expressions, eyes, and mouth shapes define personality instantly.
Tips for designing beginner-friendly faces:
- Keep eyes large for friendly characters.
- Use smaller eyes for more serious or mature characters.
- Experiment with eyebrow shapes to change emotions.
- Use simple shapes first, then refine them.
Create separate layers for eyes, eyebrows, mouth, and nose. This gives you flexibility to adjust placement and size.
Simple Storyboarding Frameworks for Creators
Refine Your Line Art
Once your sketch looks solid, create polished line art on a new layer.
Line art tips:
- Use a clean brush with smooth settings.
- Keep strokes confident and steady.
- Vary line thickness to add depth.
- Avoid too many small details simplicity is appealing.
Photoshop allows you to zoom in for precision without losing quality.
Storyboarding Mistakes Beginners Should Avoid (Complete Guide)
Build a Consistent Color Palette
Colors bring your character to life. Creating a palette before coloring helps maintain style consistency.
When choosing colors:
- Think about personality (soft pastels for gentle characters, bold colors for energetic ones).
- Pick a main color plus 2–3 supporting colors.
- Use contrasting colors to highlight important areas.
- Avoid using too many colors. Simplicity is stronger.
Use Photoshop’s Color Swatch panel to save and reuse your palette.
Why Every Author Should Use Storyboarding Tools
Add Flat Colors
Start with flat colors before shading. Create a new layer under your line art and use the Brush or Paint Bucket Tool.
Tips for flat color stage:
- Keep edges clean.
- Color large shapes first (skin, clothes, hair).
- Use clipping masks to avoid coloring outside the lines.
This sets the foundation for your shading and highlights.
Easy Storyboarding Tips for Beginners Who Can’t Draw
Add Shadows, Lighting, and Highlights
Shading adds volume and dimension to your character. It makes your artwork look more professional and dynamic.
Types of shading you can use:
- Soft shading: Smooth, airbrushed shadows
- Cell shading: Hard, sharp shadows (popular in animation)
- Cross-hatching: Hand-drawn sketch shading
Photoshop tools like Multiply for shadows and Overlay or Screen for highlights help you build realistic light effects.
Think about:
- Where the light is coming from
- How strong the light is
- How it affects skin, clothes, hair, and materials
Lighting also influences mood, so choose it carefully.
Turn Story Ideas Into Visual Adventures with Boards
Add Clothing, Hair, and Accessory Details
Details make your character unique.
For clothing:
- Add simple folds and wrinkles.
- Use darker colors along the edges for depth.
- Create patterns on a separate layer for easy editing.
For hair:
- Draw main shapes first.
- Add strands and highlights last.
- Use curved strokes to show flow.
For accessories:
- Keep them readable and not overly complex.
- Use contrast to make them stand out.
Details should support the design not overwhelm it.
Storyboarding for Kids’ Books and Digital Stories
Enhance Your Character With Texture
Textures give your character a handmade feel.
You can add texture using:
- Custom Photoshop brushes
- Grain overlays
- Layer effects
- Pattern brushes
Textures work well for clothing, hair, skin, or props. Keep them subtle so they don’t distract from the main design.
Tell a Beautiful Story in 8 Simple Storyboard Frames
Clean Up the Artwork
Before finalizing your character, clean up messy lines, rough edges, or color spills.
Checklist for cleanup:
- Smooth line edges
- Consistent shadows
- Balanced highlights
- Clean borders
- Uniform colors
A polished final illustration shows professionalism and attention to detail.
Turn Your Imagination Into Reality with Storyboards
Create a Character Turnaround (Optional but Useful)
If you plan to animate your character or design multiple poses, create a turnaround sheet.
Include:
- Front view
- Side view
- Back view
- ¾ angle
Photoshop layers make it easy to reuse proportions and adjust features.
Pro Storyboarding Tips from Pixar and Disney Artists
Export Your Character Design
After finishing your character, export it in the format you need.
Best export settings for beginners:
- PNG for high-quality images
- JPEG for web upload
- PSD for layered editing
Choose 300 DPI if you plan to print your character.
Why Storyboarding Matters for Writers and Artists
Conclusion
Designing 2D characters in Photoshop is a fun and accessible skill for anyone willing to learn. By understanding character fundamentals, planning with simple shapes, refining your line art, and using color thoughtfully, you can create expressive, polished characters even as a beginner. Photoshop gives you the flexibility to experiment, adjust, and improve your work step by step making the creative process enjoyable and beginner-friendly.
Whether you’re creating characters for a game, animation, children’s book, or personal project, the key is practice and exploration. The more characters you design, the better you’ll understand shapes, proportions, lighting, and personality. With patience and creativity, you can bring your imagination to life through characters that feel real, relatable, and visually appealing.