
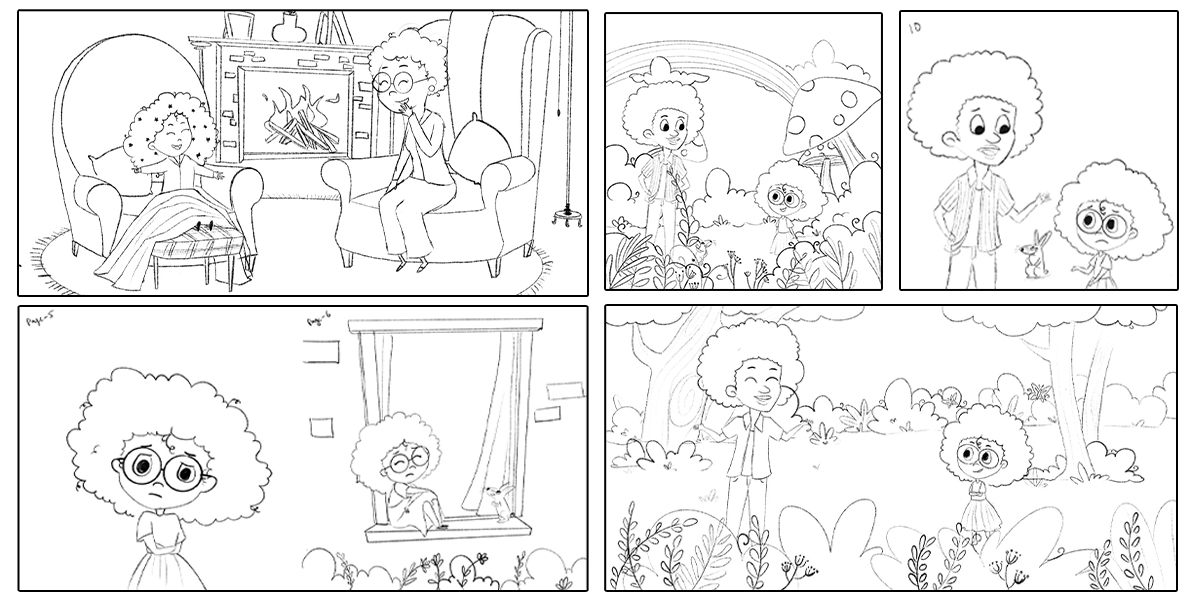
Every great children’s book starts with a spark of imagination—an idea full of wonder, emotions, and magical moments. But turning that idea into a visually engaging story that captures a child’s heart requires planning. This is where storyboards step in. A storyboard helps you map out your story visually, frame by frame, before you begin illustrations or final artwork.
Whether you’re a children’s book author, illustrator, or a creative storyteller, learning to tell a beautiful story in 8 simple storyboard frames will make your narrative clearer, stronger, and more enjoyable for young readers.
In this guide, you’ll learn how to use 8 essential storyboard frames to shape your story from start to finish. We’ll also explore common mistakes to avoid, and a quick checklist to help you storyboard with confidence.
Why Use a Storyboard for Children’s Books?
Children’s books rely heavily on visual storytelling, and a storyboard lets you:
- Organize scenes in a logical flow
- Show emotions, expressions, and actions clearly
- Balance text and visuals across pages
- Spot gaps, plot jumps, or weak transitions early
- Maintain consistency in characters, colors, and style
Our storyboarding services become your creative roadmap, helping both authors and illustrators shape a strong and meaningful narrative.
Also Read:Turn Your Imagination Into Reality with Storyboards
8 Simple Storyboard Frames to Tell a Beautiful Story
Let’s break down the eight essential frames that help you build a meaningful and engaging story.
Frame 1: Introduction to the Main Character
Your first frame should introduce your main character—the heart of the story. Show who they are, where they live, and their personality. Children connect more with characters when they see them in their familiar world.
Goal: Set the stage and build an emotional connection.
Tip: Keep it visual and simple.
Frame 2: The Character’s Everyday World
Next, show your character’s normal life and routine. Children need to see what “normal” looks like before something changes.
Goal: Build context and create a contrast for upcoming events.
Example elements: favorite hobby, school day, magical forest, cozy home.
Frame 3: The Problem or Conflict Appears
Every story needs a problem to keep young readers engaged. This frame introduces a challenge, mystery, fear, or unexpected situation.
Goal: Create curiosity and emotional involvement.
Tip: Show the problem visually—expressions matter more than words.
Frame 4: The Decision to Take Action
Your character must choose to solve the problem. This is where courage, curiosity, or determination shines.
Goal: Show your character’s motivation and decision-making.
Tip: This frame creates the turning point of the story.
Frame 5: The Journey or Adventure Begins
Now the character sets off on a journey—either physically or emotionally. This frame usually has movement, exploration, or the beginning of change.
Goal: Build excitement and momentum.
Tip: Use this frame to add visual appeal, new places, or new characters.
Frame 6: Challenge, Tension, or Lesson Moment
This is where your character faces the hardest moment a struggle, fear, or an important lesson.
Goal: Build emotional depth and teach the core message.
Tip: For children’s books, keep the tension gentle yet meaningful.
Frame 7: Resolution and Positive Outcome
Show how the character solves the problem. The resolution should feel satisfying and show growth. Kids love seeing how courage, kindness, or creativity wins.
Goal: Provide relief, joy, and a sense of accomplishment.
Tip: Make the resolution visually bright and uplifting.
Frame 8: Ending with an Emotional Touch
End with a warm emotional moment—a hug, a smile, a moral, or a beautiful closing scene that leaves children with a positive feeling.
Goal: Make the ending memorable and heart-warming.
Tip: Use this frame to reinforce the lesson or show a new beginning.
Also Read:Pro Storyboarding Tips from Pixar and Disney Artists
Common Storyboard Mistakes to Avoid
Even good stories can fall flat if the storyboard isn’t planned correctly. Avoid these common mistakes:
- Too many scenes crammed into pages – Keep it simple and clear.
- Not showing emotions visually – Children read faces more than tex
- Skipping the conflict – Without a problem, there’s no story.
- Inconsistent character design or setting – Keep the look uniform.
- Overloaded text in frames – Let visuals speak first; text supports.
Fixing these early saves hours of editing later.
How to Start Storyboarding for a Children’s Book (4 Steps)
If you’re new to storyboarding, here’s a beginner-friendly way to get started:
Step 1: Write a 6–8 Sentence Story Summary
This becomes your base. One sentence per frame—easy!
Step 2: Sketch Quick Thumbnails
No need to draw perfectly. Rough shapes are enough to plan composition.
Step 3: Focus on Expressions and Emotions
Children connect with feelings—plan facial expressions for key moments.
Step 4: Balance Text and Visuals
Storyboard helps you place text wisely so visuals stay clear and uncluttered.
Also Read:Why Storyboarding Matters for Writers and Artists
Conclusion
A storyboard is far more than a sequence of drawings; it is the visual soul of your children’s story. At The Rainbow Stories, we treat storyboarding as the foundation of a meaningful book. By planning your narrative in 8 simple storyboard frames, you give structure to imagination, clarity to creative choices, and purpose to every page you illustrate or write. For children, stories are not just entertainment; they influence emotions, values, confidence, and curiosity. When your storyboard flows smoothly, young readers feel the magic of the journey without confusion or distraction.
Each frame serves a purpose: introducing a lovable character, building a world that feels familiar, presenting a gentle conflict, guiding the child through emotions, and ending with warmth and hope. This is how The Rainbow Stories approaches storytelling. Storyboarding helps you balance text and visuals, maintain consistency in characters and settings, and create scenes that keep young readers engaged.
Whether you are writing your first picture book or illustrating expressive scenes, a storyboard gives you a clear path to follow. It acts like a creative map that lets you adjust ideas and direction before moving into full artwork. That is the same process we use at The Rainbow Stories when developing custom storybooks.
Start simple, focus on emotion, and let your visuals speak. When your storyboard connects with the reader, the final picture book has a much better chance of staying in their memory. With the right structure, your story can grow into something special—just like we aim to do every day at The Rainbow Stories.
Frequently Ask Questions
Do I need to be good at drawing to create a storyboard?
No. Simple sketches or stick figures are enough. Storyboarding is about planning, not art quality.
How many storyboard frames should a children’s book have?
You can start with 8 core frames, then expand to 12, 24, or more depending on book length.
Should I add text to storyboard frames?
Yes, but keep it minimal only key dialogue or narration. The focus is on visual flow.
Can I create digital storyboards?
Absolutely. Many illustrators use Procreate, Photoshop, Canva, or storyboard templates.
When should I finalize illustrations after storyboarding?
Only after your storyboard flows well and has been reviewed for consistency and clarity.


