
Illustrating a children’s book by hand is one of the most magical creative experiences an artist can take on. Unlike digital illustration, hand-drawn artwork carries a warmth, charm, and authenticity that young readers instantly connect with. Children respond deeply to expressive lines, soft textures, and the personal touch that traditional mediums bring to each page. Whether you’re an author who wants to illustrate your own story or an artist preparing to collaborate on a new project, creating a children’s book by hand allows you to build a world that feels alive, emotional, and full of personality.
However, the process involves much more than simply drawing cute characters or colorful scenes. A well-illustrated children’s book requires planning, consistency, storytelling, and a deep understanding of the audience. You need to think about the mood of the story, the age group it targets, the style that fits the narrative, and the emotions you want each illustration to convey. Every choice from the materials you use to the way you design characters impacts how children experience the story.
Illustrating by hand also means paying attention to details like page layout, pacing, composition, and color balance. Young readers are incredibly observant, so even small elements can make a big difference in how the book is understood and enjoyed.
This guide will walk you step by step through the entire process of illustrating a children’s book by hand. Whether you’re a beginner or an experienced artist looking for a clear workflow, you’ll learn how to bring your story to life with confidence and creativity.
1. Understand the Story Before You Start Drawing
Before picking up a pencil, study the story from start to finish.
Illustrations in children’s books are not just decoration they are part of the storytelling.
Focus on:
- The main theme
- The emotional tone
- Character personalities
- Key moments
- Setting and time period
- The message for young readers
Read the manuscript several times. Highlight scenes that need strong visuals or emotional moments. This understanding will shape your illustration style and storytelling approach.
How to Illustrate a Children’s Book by Hand: A Complete Step-by-Step Guide
2. Identify the Target Age Group
Different age groups require different illustration styles.
For example:
- Toddlers (0–3 years): Simple shapes, bright colors, minimal details
- Early readers (4–6 years): Clear, expressive characters, storytelling through images
- Older children (7–10 years): More details, complex scenes, richer backgrounds
Your style, colors, and complexity should match what appeals to the audience.
Storyboarding for Reels, Shorts, and Book Previews
3. Choose an Illustration Style That Fits the Story
Children’s book illustration offers endless creative possibilities.
Popular hand-drawn styles:
- Watercolor
- Colored pencils
- Gouache
- Ink and wash
- Graphite sketches
- Mixed media
- Crayons and pastels
Choose the style that best reflects the story’s mood.
A dreamy fairy-tale may suit watercolor; a bold adventure story may look great in ink and gouache.
From Idea to Storybook: Plan with Storyboards
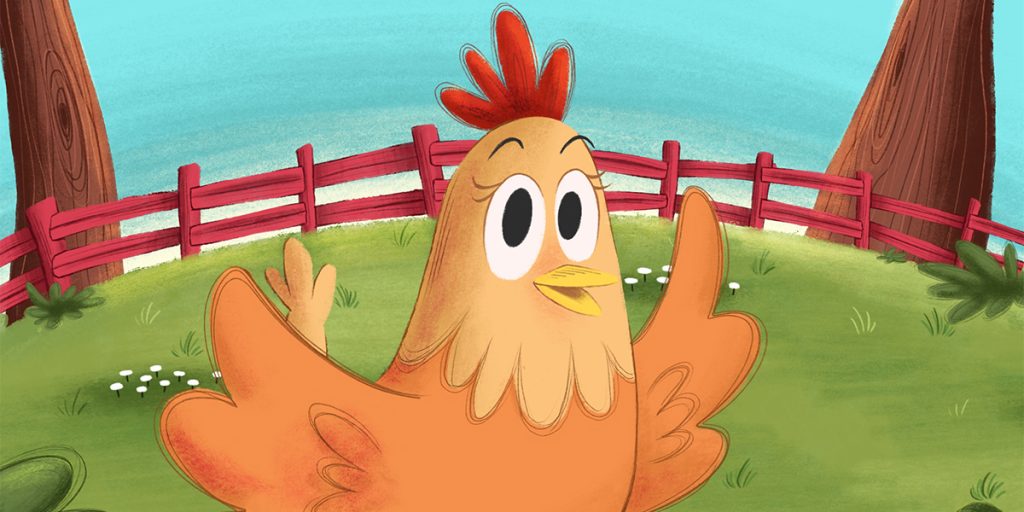
4. Create Character Designs
Character design is one of the most important steps. Children fall in love with characters through expressive visuals.
Design your characters by exploring:
- Body shapes
- Facial expressions
- Clothing
- Behavior or personality traits
- Age, size, and proportions
- Special features (big eyes, funny hair, unique outfits)
Draw your characters from multiple angles—front, side, back—and practice different poses. This ensures consistency across all book pages.
Simple Storyboarding Frameworks for Creators
5. Develop a Style Sheet for Consistency
A style sheet helps you maintain consistency throughout the book.
Your style sheet may include:
- Color palette
- Character height guide
- Texture samples
- Line thickness
- Lighting style
- Repeated objects (houses, trees, props)
This is especially helpful when illustrating over several weeks or months.
Storyboarding Mistakes Beginners Should Avoid (Complete Guide)
6. Break the Story into Scenes
Now transform the manuscript into visual moments.
Identify:
- Where action happens
- Emotional highlights
- Moments that need two-page spreads
- Quiet scenes versus dynamic scenes
Write down a list of illustrations needed usually 12–32 images depending on the book length.
Why Every Author Should Use Storyboarding Tools
7. Create a Storyboard
A storyboard is a sketch version of the entire book layout.
Benefits of storyboarding:
- Helps plan pacing
- Ensures smooth transitions
- Lets you check alignment with the text
- Helps you avoid crowded or empty pages
Create small sketches on a single sheet showing all pages. This gives a “bird’s eye view” of the whole book.
Easy Storyboarding Tips for Beginners Who Can’t Draw
8. Plan Your Page Layouts Carefully
Each illustration must work with the text, not compete with it.
Plan where:
- Characters will stand
- Background elements will appear
- Text will sit on the page
Leave enough white space so the page doesn’t feel busy.
Picture books benefit from clean, balanced layouts.
Turn Story Ideas Into Visual Adventures with Boards
9. Start with Rough Sketches
Once your scenes are planned, begin rough pencil sketches for each page.
Keep them loose and flexible.
Focus on:
- Composition
- Character placement
- Perspective
- Basic gestures
These sketches act as your blueprint, so don’t worry about perfection at this stage.
Storyboarding for Kids’ Books and Digital Stories
10. Refine Your Line Art
After the rough draft, create refined final drawings.
Tips for clean line art:
- Use smooth, confident lines
- Keep character proportions consistent
- Add small details that enhance storytelling
- Erase unnecessary lines after inking
This is where your illustrations start looking professional and polished.
Tell a Beautiful Story in 8 Simple Storyboard Frames
11. Add Color Thoughtfully
Color brings life, emotion, and energy to your illustrations.
Coloring options for hand-drawn books:
- Watercolor for soft, dreamy stories
- Gouache for bold, opaque colors
- Markers for vibrant tones
- Colored pencils for textured depth
Color tips:
- Use a consistent palette
- Match colors to mood
- Avoid overwhelming the page
- Keep skin tones and character outfits consistent
Children respond strongly to color, so use it intentionally.
Turn Your Imagination Into Reality with Storyboards
12. Build the Backgrounds and Settings
Backgrounds support the story without distracting from the characters.
Keep backgrounds:
- Soft
- Simple
- Purposeful
Add enough detail to create a setting, but avoid clutter.
Focus on elements that help the story—forest, bedroom, school, playground, etc.
Pro Storyboarding Tips from Pixar and Disney Artists
13. Use Lighting to Create Mood
Lighting affects the emotional impact of a scene.
Examples:
- Warm light for comfort
- Cool tones for nighttime
- Strong shadows for dramatic scenes
- Soft light for joyful moments
Even in hand-drawn illustrations, light direction and intensity matter.
Why Storyboarding Matters for Writers and Artists
14. Create Depth & Perspective
Children’s book illustrations benefit from a sense of space.
Ways to add depth:
- Overlapping objects
- Foreground/midground/background
- Size variation
- Light gradient
- Atmospheric shading
This makes your scenes more immersive and visually appealing.
From Sketch to Story: A Beginner’s Storyboarding Guide
15. Add Small Details Children Will Notice
Children love discovering tiny elements in pictures.
Add:
- Cute animals
- Hidden objects
- Repeated motifs
- Funny expressions
- Mini interactions in the background
Little details make your book memorable and re-readable
Create Storyboards That Bring Story Ideas to Life
16. Test Your Illustrations With Children or Parents
Once your rough pages are completed, show them to:
- Parents
- Teachers
- Children
- Other illustrators
Ask for feedback on clarity, emotions, and storytelling.
Children especially give honest, intuitive reactions.
Storyboarding 101: Build Better Children Stories
17. Finalize the Artwork
After making improvements, finalize all illustrations.
Final steps:
- Clean edges
- Smooth textures
- Balanced contrast
- Proper shading
- Consistent character design
Your book should now feel visually complete and cohesive.
Custom Character Development That Matches Your Story Voice
18. Scan or Digitize Your Artwork
Even handmade illustrations must be digitized for printing.
Tips for scanning:
- Use a high-resolution scanner (300–600 DPI)
- Adjust brightness/contrast
- Remove dust and smudges
- Ensure colors match the original art
Once scanned, you can assemble your book digitally or send it to a designer.’
Why Work with The Rainbow Stories for Character Development?
19. Format Your Pages for Printing
Children’s books require specific formatting.
Prepare:
- Trim size
- Bleed area
- Text placement
- Cover page layout
- Spine measurements
Most illustrators deliver pages as high-resolution PNG or TIFF files for printing.
Affordable Character Development Packages for Self-Published Authors
20. Proofread and Review One Last Time
Before submitting your final book:
- Check colors
- Verify character consistency
- Re-read text and placement
- Scan for missing details
- Review page alignment
- Validate clarity and safety for children
A strong final review ensures your book looks perfect in print.
How Our Character Development Brings Your Story to Life
Conclusion
Illustrating a children’s book by hand is a journey filled with creativity, storytelling, and emotion. It requires patience, planning, and a deep understanding of how young readers connect with visuals. Every page you draw becomes a doorway into the story, guiding children through characters, settings, and moments that shape their imagination. Hand-drawn illustrations carry a unique personality one that digital methods often try to mimic but can never fully replace. The textures, imperfections, and organic flow of traditional mediums give children something real to experience.
By taking the time to understand the story, build thoughtful character designs, plan your layouts, and create expressive artwork, you transform simple lines into meaningful storytelling tools. Each step, from rough sketches to final colors, contributes to the emotional impact of the book. Your choices in color, lighting, and composition help children feel joy, curiosity, excitement, or comfort as they turn each page.
The process doesn’t end with drawing. Refining your artwork, digitizing pages correctly, and preparing files for print ensures that your handmade illustrations look their best in the final book. The effort you put into these final stages is what brings your vision together into a polished, professional children’s book.
Ultimately, illustrating by hand is more than an artistic skill, it’s a gift you give to young readers. Your drawings become part of their early memories, shaping how they see stories, characters, and creativity. With dedication and practice, you can create a hand-illustrated children’s book that inspires, delights, and leaves a lasting impact on every child who reads it.